Do It Yourself, Safely: Indoor Painting
MySafetySign applauds the do-it-yourself spirit of home renovations, but there are often the same hazards in your weekend fixer-upper as there are on professional construction jobs. We want to make sure your project ends with a satisfied feeling of accomplishment, not a visit to the emergency room. Follow along as we cover the basics of home DIY in this new series: Do It Yourself, Safely.
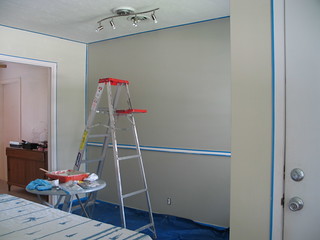
 Indoor painting projects can be refreshing, as long as they’re done safely.
A fresh coat of paint is an easy way to perk up any wall, and can be a particularly tempting project once cabin fever kicks in during the colder months. But before you get out the rollers, tarp and painter’s tape, here’s a refresher on the basic safety issues of indoor painting.
What can go wrong?
Paint stripper toxicity: Many chemicals found in paint strippers can do more than take paint off the wall. Exposure through inhalation or skin absorption can cause skin and eye irritation, headaches, drowsiness, nausea, dizziness and loss of coordination. Even if no immediate effects are experienced, some chemicals pose long-term health problems including cancer, developmental and reproductive problems and damage to the liver, kidney and brain, according to the U.S. Consumer Product Safety Commission (USCPSC).
Lead exposure: If you’re in a home built before 1978, prepping a surface for paint – by dry-scraping or sanding – could expose you to large amounts of dust containing lead particles. According to the Environmental Protection Agency, lead-based paint is the most significant source of lead exposure in the U.S. today, and it’s found in most homes built before 1960. Dust with even low levels of lead can affect the brain, central nervous system, blood cells and kidneys. At higher concentrations, it can cause convulsions, coma and even death.
Paint toxicity: When you hear people talk about the “off-gassing” of certain household products, they’re often referring to formaldehyde and other volatile organic compounds (VOCs), found in items such as paint, cleaners and wood finishes. This strong-smelling gas is released into the air and reaches moderate levels during and after painting, but emissions can rise during the curing process, and still be detected up to three months later. Exposure can cause watery eyes, runny nose, burning sensations in the eyes, nose, and throat, headaches and respiratory issues.
Ladder injuries: In 2012, emergency rooms in the U.S. saw 6,121 ladder-related injuries, according to the USCPSC. Common accidents are crushed hands and fingers, and falls due to improper use and faulty or worn construction. Consumer Reports found that even the most stable ladders twisted – allowing their feet to “walk” slightly – under the typical “weight shifting” that occurs when standing on a ladder to paint.
Best Practices
For selecting paint:
Use a water-based (latex) paint, which will emit few chemicals than oil-based (alkyd) paint. In addition, several brands now make affordable paints than contain little or no VOCs.
For wall preparation:
If your home was built before 1978, assume that it contains lead-based paint, the EPA recommends. If it is in good condition and not in a place where the painted surface will receive wear – such as on a window, do not disturb it by sanding. If lead-based paint must be removed, hire a professional.
For using ladders:
- Inspect the condition of your ladder before every use, looking for worn hinges, loose rivets, dents, bent parts, cracks or chips.
- When setting up or taking down a ladder, keep your hands away from hinges.
- Position the ladder on an even surface. Make sure the spreaders are locked, and test its stability from the ground.
- While it can be tempting to just go up a few rungs or lean out to reach a spot, never reach more than 12 inches away, Consumer Reports suggests. Stop, get off the ladder, then move it.
- Never stand above the designated top rung.
For stripping paint:
- Because every paint stripper contains different chemicals – and potential hazards, thoroughly read the instructions for use and precautions, and follow them – even if you’ve used the product a dozen times. The ingredients often change over time, the USCPSC warns.
- Those precautions include wearing the right protective clothing, goggles and gloves. Because most paint strippers are solvent-based, they can dissolve the latex or rubber of basic household gloves. Again, check the directions for the appropriate chemical-resistant glove, such as butyl rubber or neoprene.
- Ensure adequate ventilation by opening all doors and windows and using a fan to blow air away from you and toward the door.
- Do not use flammable paint strippers near any source of sparks, flame or high heat.
For painting:
- Do not paint near any heat source, such as a water heater or fireplace, and never smoke while painting.
- For painting projects above 17 feet, use a conventional extension ladder, recommends Consumer Reports.
- For two to three days after painting, keep windows open as much as possible and avoid spending time in the room.
Further Resources
What You Should Know About Using Paint Strippers [U.S. Consumer Product Safety Commission]
An Update on Formaldehyde [U.S. Consumer Product Safety Commission]
Ladder buying guide [Consumer Reports]
Lead-Based Paint [EPA]
Are you a weekend DIY warrior? We’d love to hear stories of home renovation projects and their safety pitfalls and triumphs! Get in touch with our editor, krissa at smartsign dot com, to contribute to future Do It Yourself, Safely episodes.
Category: DIY Safety


